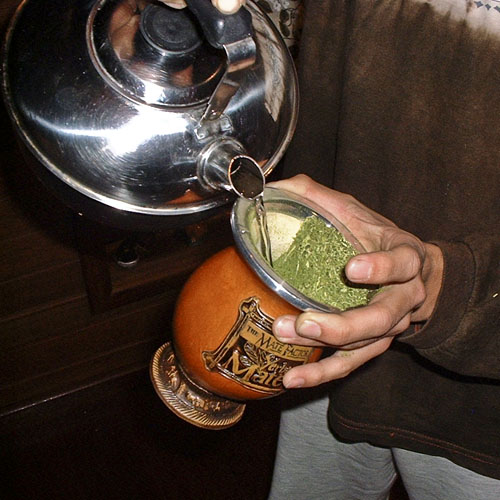
วิธีบำรุงรักษาถ้วย Gourd – Curing your gourd
โดยปกติแล้ว การใช้งานและเก็บถ้วย Gourd อาจทำได้ง่ายโดยการใช้น้ำร้อนล้างภายในและใช้ผ้าสะอาดเช็ดให้แห้ง นำไปผึ่งจนแห้ง แล้วค่อยเก็บในที่แห้ง
*เมื่อใช้เสร็จแล้ว ควรทำความสะอาดทันที ไม่ควรปล่อยทิ้งไว้นาน
*สามารถใช้ที่เป่าผม เป่าจนข้างในถ้วยแห้งสนิท แล้วค่อยคว่ำเก็บในที่แห้ง
*อย่าใช้สบู่หรือน้ำยาทำความสะอาด มันจะทำลายรสชาติของคู่ของคุณ
เพื่อทำความสะอาดภายในน้ำเต้า ที่มีเยื่ออ่อน / เนื้อเยื่อภายใน เราสามารถขูดล้างเนื้อข้างในออกได้ ถ้าเราต้องการ
เพราะเยื่ออ่อนเหล่านี้ สามารถให้รสขมพิเศษกับ Yerba Mate ของคุณ ถ้าคุณไม่ต้องการเอาออก ก็ไม่จำเป็นต้องทำเช่นนี้
หมายเหตุ: ถ้วยน้ำเต้าจะมีแกนอยู่ตรงกลาง ห้ามเอาออกเด็ดขาด ถ้วยของคุณจะรั่วทันที
แต่หากต้องการคว้านเอาเนื้อพวกนี้ออกไป เรามีวิธีดังนี้
วิธีการรักษา Yerba Mate Gourd
มีสองวิธี
วิธีแรก แบบรวดเร็ว
หมายเหตุ:ถ้วยน้ำเต้าจะมีแกนอยู่ตรงกลาง ห้ามเอาออกเด็ดขาด ถ้วยของคุณจะรั่วทันที
1. ใส่น้ำร้อน (ไม่เดือด) รอประมาณ 15-20 นาที เพื่อให้เนื้อเยื่อข้างในอ่อนตัว
2.ค่อยๆขูดด้านในของมะระโดยใช้ปลาย หลอดสแตนเลส Bombilla เพื่อเอาเนื้อมะระและเนื้อเมล็ดให้หลุด
3. เตรียมถ้วยเพื่อดื่มตามคำแนะนำในการเตรียมการปกติ
4. เมื่อดื่มเสร็จแล้ว ล้างถ้วยด้วยน้ำอุ่น 2-3 ครั้ง อย่าใช้สบู่หรือน้ำยาทำความสะอาดจากนั้นใช้ หลอดสแตนเลส bombilla ค่อยๆขูดเอาเนื้อมะระออกอีกครั้ง
5. ล้างออกด้วยน้ำอุ่น3-4 ครั้ง สามารถใช้เครื่องเป่าผม เป่าให้ด้านในแห้ง หรือ ใส่ผ้าขนหนูหรือผ้ากระดาษไว้ด้านในเพื่อดูดซับน้ำให้มากที่สุดเท่าที่จะเป็นไปได้
วางถ้วยของคุณ (ด้านข้าง) ไว้ในที่แห้งและเย็นเพื่อให้แห้ง อย่าให้ถ้วยของคุณชุ่มชื้นเป็นเวลานาน เพื่อผลลัพธ์ที่ดีที่สุดให้ถ้วยของคุณแห้งสนิทก่อนที่จะใช้อีกครั้ง
*ข้อเสียคือ รสชาติชาที่ได้อาจจะขมขึ้น
วิธีที่สอง แบบนาน
1. ล้างด้วยน้ำอุ่น 3-4 ครั้ง2.ค่อยๆขูดด้านในของมะระโดยใช้ปลาย หลอดสแตนเลส Bombilla เพื่อเอาเนื้อมะระและเนื้อเมล็ดให้หลุด
3. ใส่ใบชา yerba mate ลงไปจนเต็ม จากนั้นค่อยๆเติมน้ำร้อนใส่ลงไป
4. รอใบชาดูดซับน้ำร้อน ค่อยรินเติมจนเต็ม
5. แช่ทิ้งไว้ อย่างน้อย 12 ชั่วโมง (แนะนำให้แช่ทิ้งไว้ 1 วัน)
6. เมื่อถึงเวลา ให้ล้างทุกอย่างทิ้ง และทำ ข้อ3-5 ใหม่อีกครั้งหนึ่ง
7. ล้างออกด้วยน้ำอุ่น 2-3 ครั้ง สามารถใช้เครื่องเป่าผม เป่าให้ด้านในแห้ง หรือ ใส่ผ้าขนหนูหรือผ้ากระดาษไว้ด้านในเพื่อดูดซับน้ำให้มากที่สุดเท่าที่จะเป็นไปได้
วางถ้วยของคุณ (ด้านข้าง) ไว้ในที่แห้งและเย็นเพื่อให้แห้ง อย่าให้ถ้วยของคุณชุ่มชื้นเป็นเวลานาน เพื่อผลลัพธ์ที่ดีที่สุดให้ถ้วยของคุณแห้งสนิทก่อนที่จะใช้อีกครั้ง
*การทำแบบนาน จะไม่ทำให้รสชาติของชาที่ได้จากถ้วยเสียไป และสามารถยืดอายุใช้งานให้นานขึ้น
หรือหากการดูแลถ้วย Gourd ของจริงมันยุ่งยากเกินไป เราขอแนะนำ ถ้วย Silicone Gourd พร้อมหลอดแสตนเลส ราคาเพียง 450.-
Why Cure Mate Gourds
There are two reasons to cure a mate gourd:
- To clean out the inside
- And to prevent cracking
Wooden gourds are very sensitive and crack very easily. Curing them helps prevent this from happening.
I won’t be going over how to cure wooden gourds in this post. It’s a completely different process that you can learn over here.
Calabash gourds on the other hand, you’ll find that there’s soft membrane/tissue inside. And that’s what we’re trying to get rid of when we’re curing the gourd.
Why?
Because they can give an extra bitter taste to your mate. If you don’t mind that, you don’t have to do this.
But if you do, here’s how to cure your yerba mate gourd…
How To Cure Yerba Mate Gourd (Long Version)
If you remember what I said in the beginning, you know that there are two ways to cure a mate gourd.
Quick Note:
Calabash gourds have a little stem in the middle. DO NOT REMOVE IT. Your gourd will leak and become useless.
Step 1
Rinse the gourd under warm water a few times. Do not use soap or cleaner. This will ruin the taste of your mate.
Step 2
Take a small spoon and start gently scraping the inner walls (avoiding the stem) of your gourd. You want to remove all the loose tissue.
Step 3
Once finished, rinse it out again and fill your gourd to 3/4 or to the top, with dry unused yerba mate. (If you’re wondering why you have to use new yerba mate to cure it, I’ll explain below)
Step 4
Now add some hot (not boiling) water. Wait for the leaves and the gourd to absorb some of the water. And then add some more.
Step 5
Now you wait. Let the gourd sit in the mixture for at least 12 hours. Some recommend 24 hours. And others say 3 or even 5 days.
Step 6
After the time has passed, you can now scrape everything out. But you’re not done yet.
Step 7
Repeat steps 3-6.
Step 8
Pat the insides with a paper towel or cloth and soak up as much water as you can. Place your gourd in a bright, cool and dry spot to dry.
It’s best to have your gourd tilted on its side to let air pass through more easily.
Now your gourd is finally cured!
If that sounds like a long process to you, that’s because it is. Plus, you have to sacrifice two servings of yerba mate.
Step 1
Take your gourd and fill it to the top with hot water (not boiling).
Step 2
Wait for 15-20 minutes. The hot water will loosen the soft tissue.
Step 3
Then when time’s up, pour out the water and start scraping the inner walls. Make sure you get as much as you can.
Step 4
Rinse it under warm water.
Step 5
Pat the insides with a paper towel or cloth and soak up as much water as you can. Place your gourd (on it’s side) in a bright, cool and dry spot to dry.
And guess what? You’re done!
Now I know what you’re thinking, “How come I have to use yerba in the first method and not the second?”
The answer is simple.
A Quick Way To Dry Your Gourd
After curing a gourd, you still have to wait for it to dry completely before you can use it.
However, I found a way to speed up that process.
All you have to do is use a hair dryer.
That’s right.
Turn on your hair dryer and point it toward the opening of the gourd. Keep it about a foot away so it’s not too hat. And just rotate your gourd in the other hand.
This will get most of the moisture out. As well as any debris still left in there.
I do this after curing and after using my gourd.
How The Two Curing Methods Differ
One of the main purposes for curing a gourd is to enhance its flavor.
When you use yerba mate for curing (the long method), the gourd will soak up the flavors from the infusion. So when you drink from it, it won’t taste weird or too bitter.
However, what I’ve found is that it doesn’t make much of a difference in taste. This is why I simply go for the shorter method.
And because I’d rather use the yerba mate to drink, instead of curing. Plus, the more you use your gourd, the better it’ll taste anyways.
Final Words
As you can see, curing your gourd is important for flavor and longevity.
And despite the two methods being completely different, they both can be extremely useful. Here’s how…
If this is your time drinking yerba mate, chances are you want to try it the moment you get your gourd. This is when the second curing method comes in handy.
But if you have multiple gourds in hand (which is recommended), curing one of them the long way won’t stop you from drinking yerba mate. And if you have extra yerba mate to spare, it’s no big deal.
Personally, I don’t taste the difference between the two.
Just keep drinking from your gourds and it will “cure” along the way.
P.S. You might want to try our silicone-capped bombilla because it doesn’t need curing.
Recent Comments